Introduction - Starting Seeds Indoors
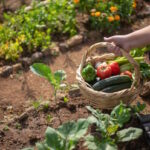
Growing your own vegetable and other plants can be very rewarding. Beside saving money by not having to buy vegetable transplants it can be plain fun to watch the seeds germinate and grow to the desired transplant.
However it can be challenging and that’s why we give you this brief 10 steps guide for starting seeds indoors.
1. Buy Good Seeds!
In order to grow healthy plants, you need to start with good seeds. As tempting as the $1 seeds at big box stores might be, it is better to buy seeds from Arthur Greenhouses or other reputable companies. They are fresher & have better germination rates.
2. What to start indoors & when?
Some seeds need more of a head start than others. Starting seeds indoors will help you eat delicious produce earlier. Use the last frost date in spring as a basic guide for planning your planting dates. For Arthur and area the third weekend in May is considered to be safe. Find the frost date for your area online and use this date in this very extensive, but clear seed starting calculator. Below you will find this information for some common crops.
6 weeks before last frost: Hot peppers, brassicas, onions;
4 weeks before: Tomatoes, basil, eggplants, okra;
2 weeks before: Cucumbers, squash, melons, corn;
Direct Sow*: Carrots, beets, beans, greens, Dill.
* Most crops with a tap root don’t like to be transplanted.
We recommend to make your own chart and use a spreadsheet with the following headers: Description, # of plants, Seed Starting Date, Actual Seed Starting Date, Germination Date, Transplant Date, and Actual Transplant Date. Or download the spreadsheet or the PDF-file.
If you’re wondering how much you need to plant for your family, we have some guidelines about how much you need to plant.
3. Containers
The most important thing for containers is drainage. You don’t want water sitting in the base of a pot as it can rot your seedlings. You can use seed trays we sell really cheap at Arthur Greenhouses with or without a dome or get creative & use egg cartons, paper towel rolls or milk cartons. Make sure they’re clean & disinfected.
4. Soilless Media
Use a ‘soilless medium’ (Pro-Mix or the special mix we use at Arthur Greenhouses – both available at our place) to start your seeds in. It is light and has minerals mixed in that will allow your seedlings to grow easily. You can mix in compost and nutrients once you transplant, but do not use those in the seed containers! Moisten soil evenly before adding to containers.
5. Seeding
Fill your containers with moist soilless medium. Create divots in the soil for the seeds. Place one or two seeds in each plug hole or container. Cover lightly with
soil. Make sure you label your plants. You don’t want to get mixed up if you are planting a lot of varieties of one type of plant.
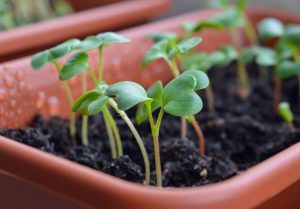
6. Where to grow the seedlings?
Place your seedlings in the brightest, warmest window you have. If the plants have to stretch for light, they will get long and leggy. You can use heat mats (the seeds germinates way quicker and love growing roots) or space heaters and grow lights to create these conditions if you don’t have a greenhouse or sunny window.
7. Airflow & Watering
Putting a fan on your seedlings is a good idea. It will help air flow in the room, preventing dampening-off disease or mould from forming. It will also make your plants stronger an more resistant to wind once they are living outside.
Make sure your seeds or young plants don’t dry out from the airflow or too high temperatures caused by high light levels. For this reason we thiink it might be a good idea to put the whole tray in a clear plastic bag. The “soil” in your tray or container should be moist at all times!
8. Hardening off
In order for your seedlings to thrive living in the great outdoors, you will need to help them adjust. Place them outside in speckled light on warm days, gradually increasing the amount of time they spend in sun or cooler temperatures over a week or two before they go outdoors permanently. This will prevent sun or cold damage.
9. Transplanting
Once your plants have started to outgrow their pots, you can transplant them. Before you start transplanting outside, make sure the actual weather is suitable for your transplants.
If you transplant into another (bigger) pot or container you can be creative with the type of containers as long as there is good drainage. You can mix compost or manure, peat moss, vermiculite and potting soil to give your seedlings some food. Fill a new container half-way with moist soil. Carefully remove the seedlings from the original containers, place them in the new pots and fill up with soil.
10. And Now?
In the very beginning of the season your plants can be still vurnerable for cold, windy and dry conditions. Give care and protection; bring them in at night or cover them up and make sure they stay moist.
If all this didn’t work out for you, try to find out what went wrong and try to avoid this mistake for the next time or season and head our way to help you out.
Luckily we grow a lot of transplants, either it is vegetable transplants herb transplants or annual bedding plants. We might even be able to tell you where you can improve your own seed starting.
To a bountiful harvest or stunning flowering garden!
We hope this guide is helpful to you. Let us know if you have any questions or additions.